



Getting Started 2 min read Updated: 2026-11-14
Creating Your First Client, Case, and Task
The fastest way to configure your workspace is to complete three foundational steps right after signing in: add a client, create your first matter, and schedule your first task or court date.
Step 1: Add Your First Client
- Open Clients in the left navigation menu.
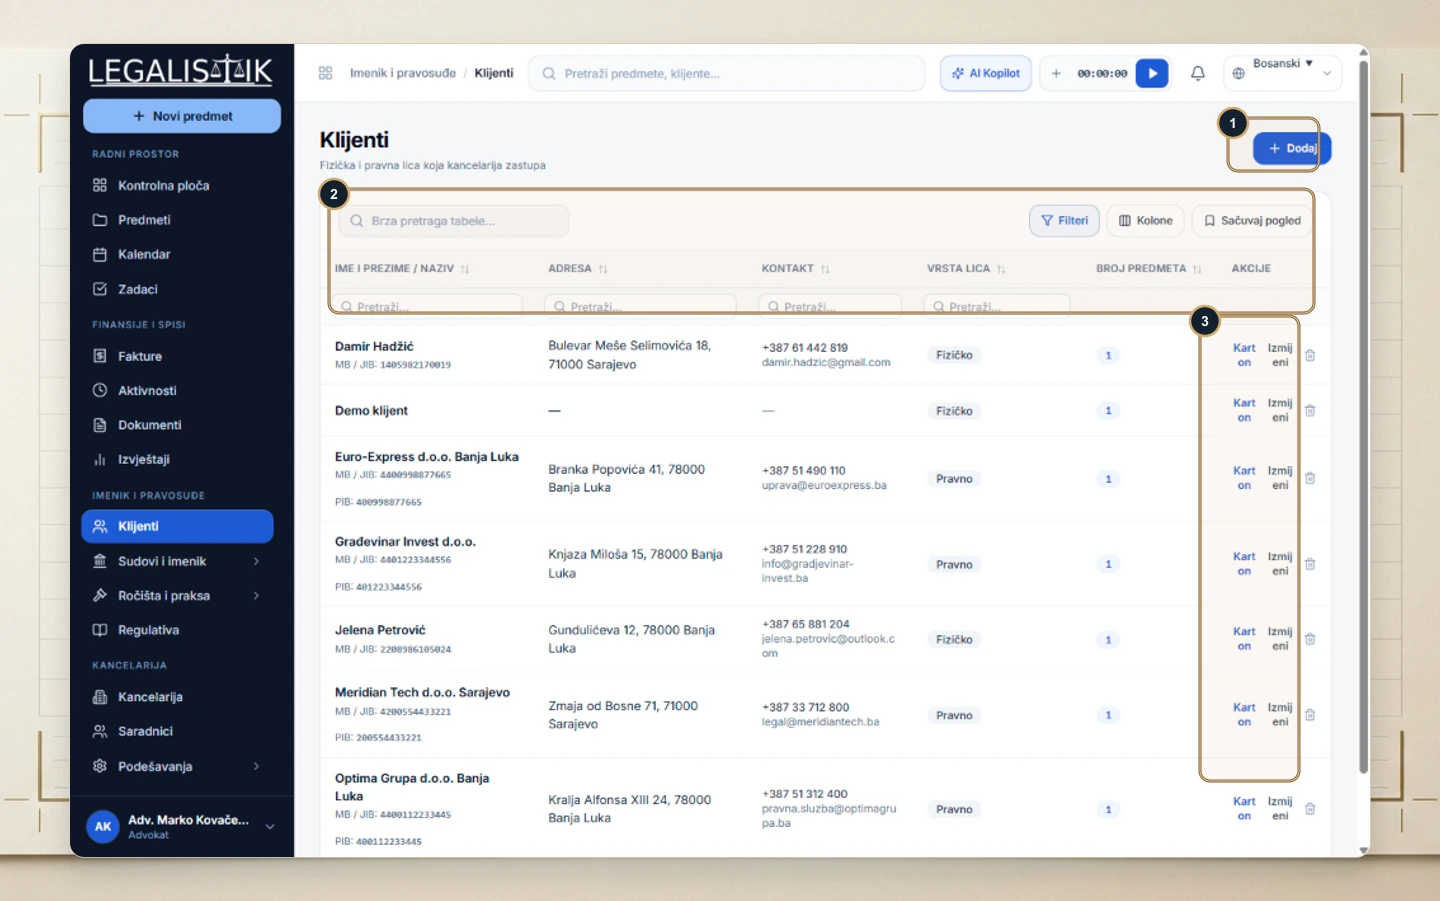
- (1) Click + Add in the top-right corner to create an individual or corporate client record with tax ID, address, phone, and email.
- (2–3) Use table filters and the Profile / Card link anytime to view that client’s matters, billing summary, and shared documents.
Step 2: Open Your First Case
- Click + New Case at the top of the sidebar (or from the Cases module).
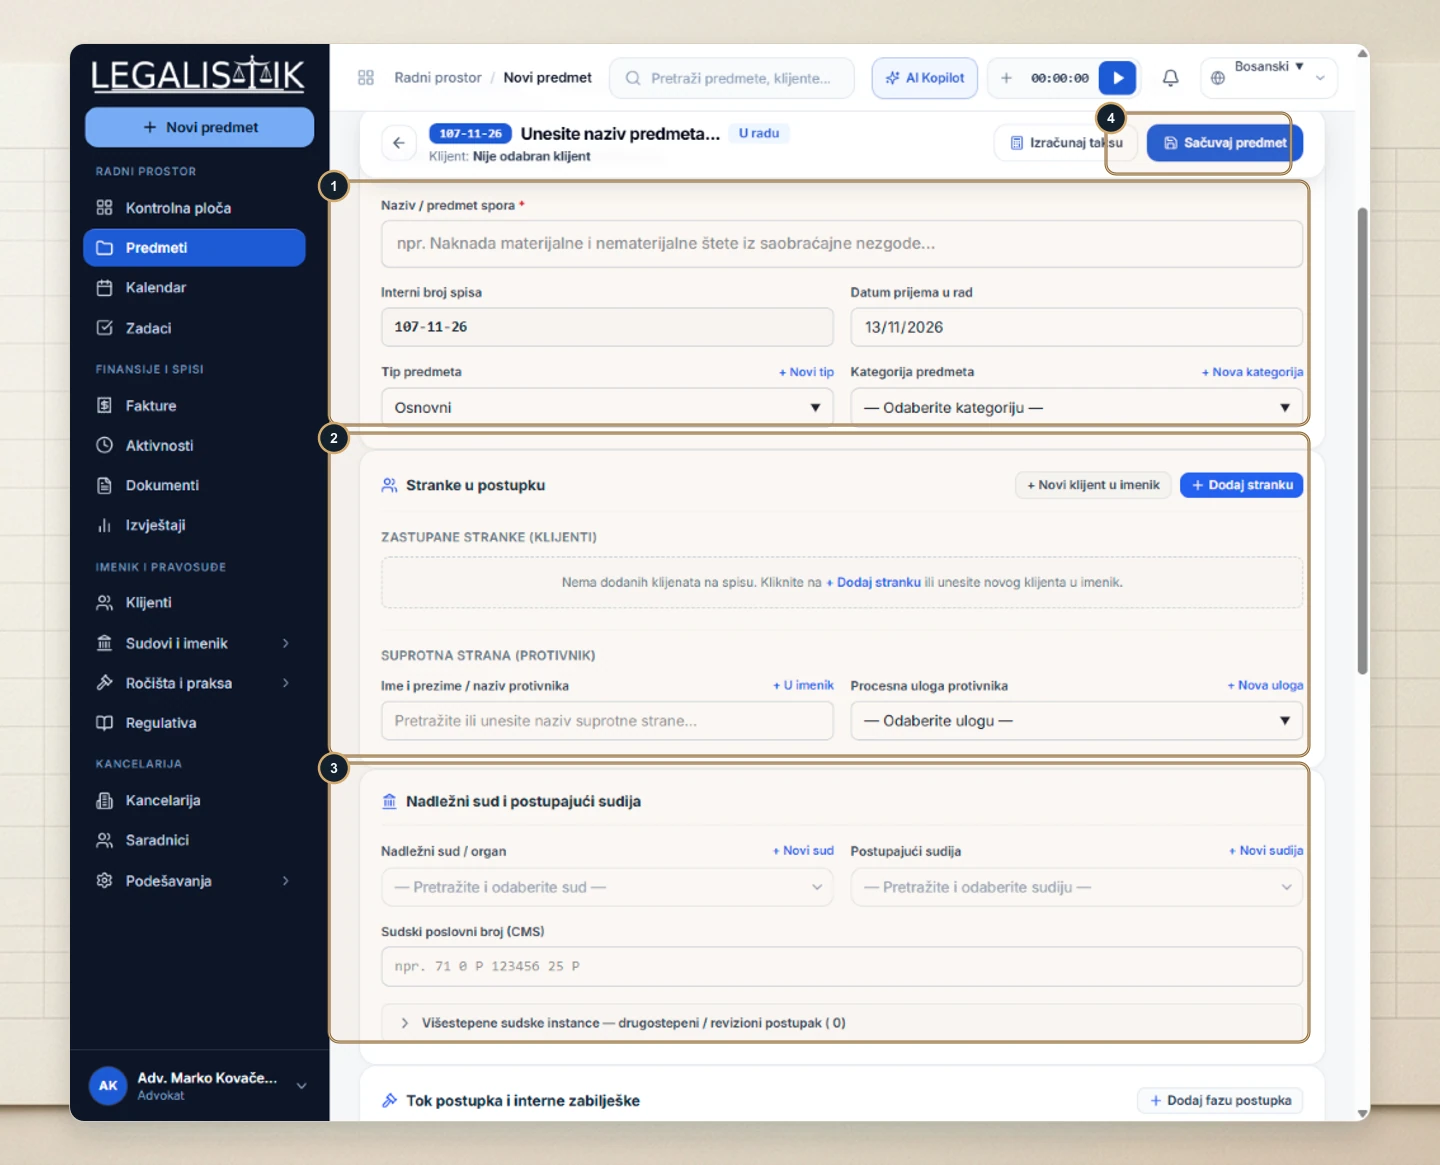
- (1) Enter the Matter Title, review the auto-numbered Internal File ID, and pick the Case Type and Category.
- (2) Under Parties, click + Add Party to attach your client and enter the Opposing Party.
- (3–4) Select the Court, Judge, and Court Docket Number, then click Save Case.
Step 3: Schedule Your First Task or Hearing
- Go to Tasks (or open the Tasks tab inside your case) and click + Add Task.
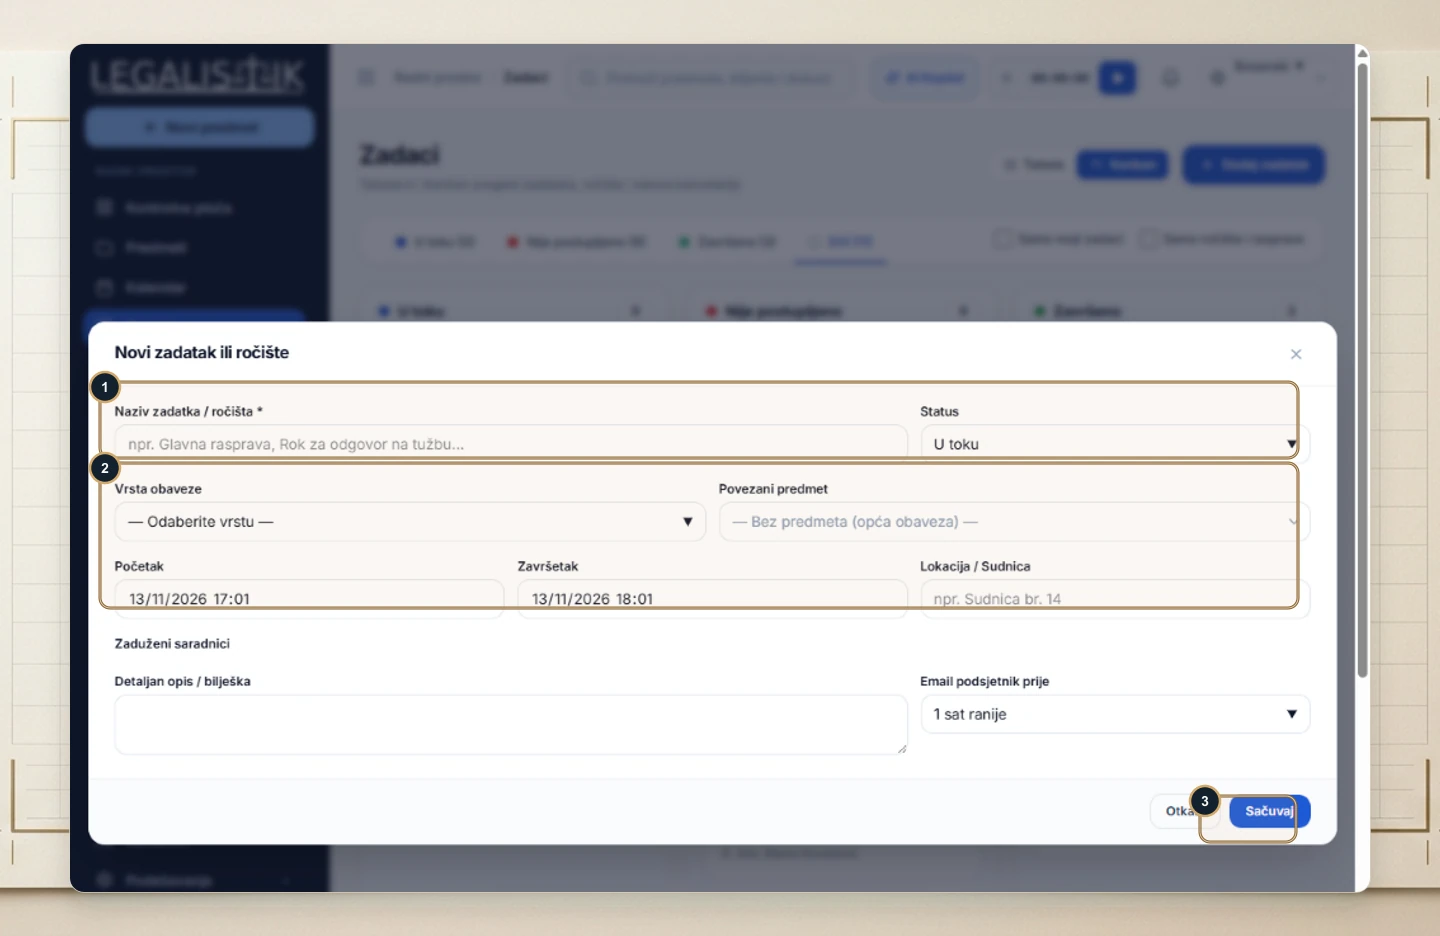
- (1) Enter a descriptive Title and status (In Progress).
- (2) Pick the Task Type, link the Case, set start/end times, enter the Courtroom / Location, and select an email reminder window.
- (3) Click Save—your task immediately syncs across the Dashboard, Calendar, and Kanban Board.